Idea for a Kimono-Style Pattern

I’m having an idea for a knitting pattern.  Right now I’m finishing up my Lacy Night project (which will be shown after Christmas, because the shawl pin closure is still in transit).  After that, it’s back to the Max Sweater.  But then I might get around to this next idea.  I’ll put it here in case someone is looking for a big stashbuster easy project and would like to test-knit it.

Triple-stranded with laceweight yarns.   I’ll use Fleece Artist Saldanha, Unique Sheep Ling, and Jojoland Cashmere for the body and swap out the Jojoland for Henry’s Attic Cascade Lace for the sleeves.  (I really do need to do some serious stashbusting!)  Probably a size 7 needle.  Knit three big squares that are 20″ square.  Pick up stitches along one side of one square and another side of another square; join.  This will be your sleeve.  Knit until it is a sufficient length (mine will be about 20″ anyway).  Repeat on the other side of the center square with the remaining square for the other sleeve.  If desired, and if enough yarn is left, pick up stitches all around the edges.  K1inc around, then knit 12 rows to make a ruffle (remembering to increase three times in one stitch at each corner).  Bind off knitwise.  Weave in all ends.

The way I’m envisioning this, the fronts will hang down when it’s worn casually.  I’ll put a button inside the right front and a buttonhole (or yarn loop) outside the left front, to fold across like a cardigan.  Then I’ll use a shawl pin to close the outer right side to the left.

My thought, at least for my own version, is that because the body and sleeves will be variegated, I’ll do the ruffle in a coordinating solid yarn, maybe a green.

The Unique Sheep, Ling Yarn, “Waltz of the Flowers” Colorway
Fleece Artist Saldanha
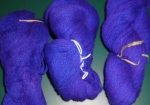
Jojoland Lace Cashmere, dyed by Mom
Henry’s Attic Cascade Lace

Maybe hot pink for the ruffle!

Finished!

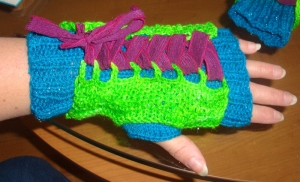
The second version of Sacharissa’s Gloves is done.  (Two gloves.) 

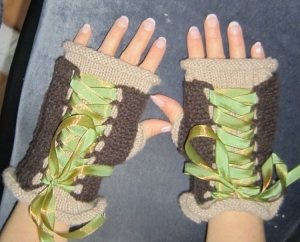
Sacharissa Cripslock is a reporter for the Ankh-Morpork Times in the more recent Discworld novels.  The original design, shown in cream and brown with olive ribbon, is a color combination much more likely to occur in A-M than this garish 1980s look.  Still.  Maybe I can wear the newer ones with Diane’s 1980s colorblock ski jacket in similar colors?  Nah. 

The original gloves, with a ruffled cuff rather than a ribbed one.
I think these can only possibly be worn with a black coat.

Final Manicure Conclusions

Six weeks of manicure experimentation have left me with the conclusion that “the old ways are the best ways.”

Original method:  OPI base coat, two coats of OPI color, OPI top coat.  Used to last me almost two full weeks.  Fully removes in about ten minutes using any kind of nail polish remover.

First experiment:  Creative Nail Designs’ “Shellac” products – base, two color coats, and top coat, UV treated.  Lasted me a little over a week because I started peeling them off when they started growing out.

Second experiment:  Same Shellac process with a different color.  Lasted me a little over a week because I started peeling them off when they started growing out. 

They say that if you keep repeating something with the expectation that it will turn out differently this time, it’s a sign of insanity.  Well, I’m not insane, so I stopped using the Shellac.  At this point I’d considered my experiments to be done.  I did the turquoise manicure (which you can vaguely see in the turquoise/chartreuse glove photo) using the Original Method.  This lasted less than two full weeks even though all three bottles were new product.

Third experiment:  Topped one of those nails with a Shellac top coat and treated under UV light.   This extended the turquoise on this nail for at least another week.  A good sign, I thought.

Yesterday I removed all the turquoise nail polish from all my nails.  The one with the Shellac on it took about six minutes of soaking in acetone nail polish remover.  Well, six minutes, no big deal, I read a book  while my finger soaked.

Fourth experiment (last night):  Did a full Original Method manicure on my left hand, then when dry, topped them all with Shellac top coat and treated under UV light.  I really thought this was going to be a winning procedure!   But the color I’d chosen looked bad – it was an old gold nail polish that appeared like molten gold in the bottle, but on the nail it was trailer trash glittery – so in frustration I decided to strip all the nails and leave them bare until just before we leave for vacation.

What I had failed to consider (when topping the Original manicure with Shellac) is that EACH NAIL takes six minutes, or more, to remove!  Luckily I had only done one hand, but even so, it was more than half an hour later when I was finally able to put the lid on the remover and wash my hands.

Conclusion:  Shellac just is not worth it.  I’d rather re-manicure every week than get two weeks’ wear out of a Shellac manicure and then spend 60 minutes to remove it.  Bleah.

Corollary:  I have a bottle of Shellac top coat, one bottle of base coat, and four colors, if anyone wants them!  But you do need a 36-watt UV light to cure it.

Another Thing about Dyeing

I really don’t understand this next bit.  Perhaps someone (G-G?) with more dyeing experience can let me know.

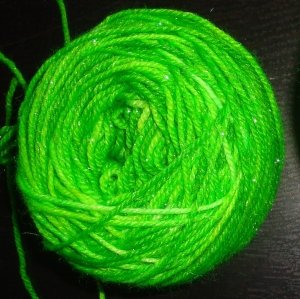
This is the yarn I just dyed.
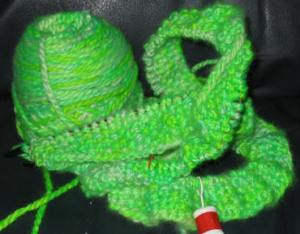
This is the yarn I’d used most of the chartreuse on, around 2004.
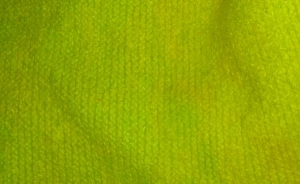
They look pretty similar, right?  Well, here is the pic I posted last week:  the poncho you see in the 2004 photo, after it was finished.  So it’s 6 years old.
Look how yellow this is!
This last photo is definitely what I call chartreuse.  The other ones look like lime, or grass green, in places.  I might have believed that the dye in the jar had changed color over time, except that the photo of the beginning of the poncho matches the stuff I just dyed last week.  So it makes me wonder if this glove will fade/alter to a much yellower green over time…?  Anyone know?