I love to use linen stitch and it’s a component of four of my designs (Radio Liberty, Radio Free Europe, Vacation, and Quirmian Cap, all available on Ravelry). Sometimes in forums people ask me what makes it so great, so I decided to write a blog post about it.
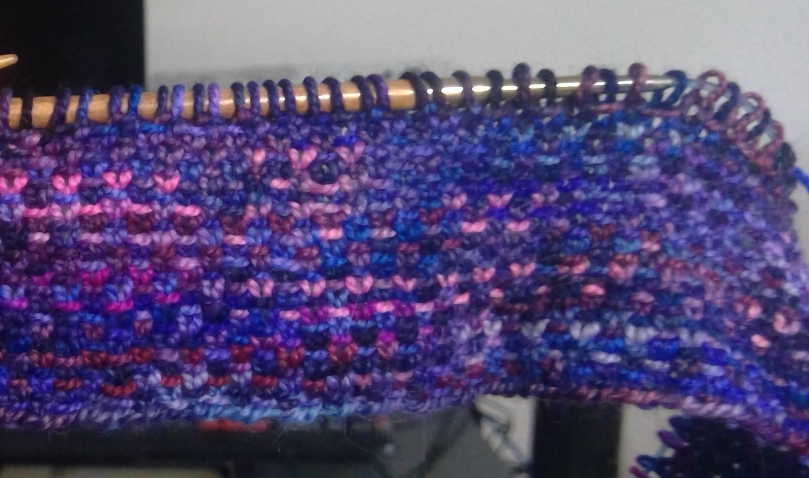
The two things that work best about this type of stitch is that it is a non-stretchy pattern, so it acts like a woven fabric, and that it breaks up colors so there is no pooling. It is also an excellent choice of stitch when you are working two different color skeins, especially if you are trying to create a gradient or fade effect. Shown in the picture are two different Koigu KPPPM skeins, P218 (the hem and first four rows), then P218 alternating with P829. The first skein is dark, with blues and plums; the second skein has a lot of pepto pink in it, along with similar blues (but no plum). In stockinette stitch, if you worked this way, you’d have some pretty obvious chunk sections that showed off the pepto pink. With linen stitch, the alternating row breaks up the stitchwork so there’s no big area that grabs the eye. Alternating colors (no matter which stitch pattern you use) also prevents a hard line or stripe such as you see when working one color and then dropping it to switch to a second color.
How is linen stitch worked? It’s quite easy after you complete a few stitches. Spatially it’s a bit weird to start. Try a swatch of 20 sts.
Cast on 20. Turn work.
Setup row (WS): purl across row.
Row 1 (RS): knit the first stitch. Bring the yarn to the front, as if to purl, slip the next stitch purlwise, take yarn to the back. The second stitch has been “wrapped” but not worked. Knit the third stitch, wrap the fourth. Continue across the row: knit 1, wrap 1, until the last stitch is reached. This is a wrap stitch. Turn work.
Row 2: Bringing the yarn around from the last row (so that the final RS stitch remains wrapped), purl the first stitch. Take yarn to back as if to knit, slip the next stitch purlwise, bring the yarn to front. The second stitch has been wrapped but not worked. Continue the pattern across the row: purl a stitch, wrap a stitch, until the last stitch has been wrapped. Turn work.
Repeat rows 1 and 2 until your piece is the desired length. Bind off.
On each row, you are wrapping the stitches that were previously worked, and working the sts that were previously wrapped. This is all there is to linen stitch. Another bonus is that it lays flat, so your piece doesn’t require special edge stitches.
One very important note: it is a tight, tight result. If you work with the recommended needle size for your yarn, you’re going to be fighting the stitches all the way, and you’ll end up with knitted cardboard. I recommend going up at least three needle sizes from the recommended. The Koigu you see above is being knit on 8’s.
Because of this tension, the gauge in linen stitch is pretty fine, and you’ll have to work a lot more stitches to get a finished piece in the size you want. The Koigu is coming out to 7 sts and 10 rows per inch, and KPPPM is a sock-weight yarn. So your project will take longer to complete.
Try it!